|
by Maddie, Main Library  Watch this video for a quick tutorial on how to make your own zine at home with only paper, scissors, and markers. Want to read some zines? Did you know that The City Library has one of the largest zine collections west of the Mississippi? Oh yeah. We've been collecting zines from around the country, and the world, since the 1990s, and have over 6,000 items. You can even search for them in the library catalog. Just do a keyword search for "zines." You'll even be able to place them on hold and come check them out. Rad. You can also read some teen-made zines online in our Teen Squad collection. Look for the Mental Health Books Zine, and Learning About Social Equality Through Literature. If you'd like us to print a free copy for you, or help you print your own zines, see this page for more details. A zine festival? Did you know that The City Library has hosted an Alternative Press Festival every year for the last 11 years? Zine makers and other independent artists gather to share their creations, sell art, and talk about zines. Visit our Alt Press Fest archive to see posters, read interviews, and see art from past year's festivals.  Artwork by Chloe Monson This year's festival is happening virtually in October, but there will still be ways to get involved and take home some awesome local art. Don't miss the Teen Zine Reading on October 17th at 2pm, featuring local teen zine makers. Whether you’re a beginner or have your own zine series, we’d love to have you join! It will be a drop-in event, so no registration is required. Follow us on Facebook or Instagram for event links and latest details on this year's festival.
Thanks for reading and have fun making art!
0 Comments
by Meagan & Chris  Whether you are an experienced writer, or have no earthly idea where to begin -- these prompts are for you. We’ve designed these prompts with the express purpose of knocking you out of old grooves, known territories and familiar habits, jolting you into exploring new terrains, or, perhaps, old terrains . . . but with a sparkly new set of eyes. As many writers will attest, there’s nothing like the odd bit of structure to free up your writing and, as you may soon see, many of these structures are fairly odd. Consider these prompts, first and foremost, an invitation to have fun. So loosen up, dive in, and see where they take you. We’d love to see what you come up with.  Find something small -- small enough to fit in a pocket: a cookie, a coin, a seedpod, a marble, a rag, a bit of bright, striped string, a...something, preferably not actively alive (except in that sparky, metaphorical sense -- i.e., no scorpions or baby birds). Something found on a sidewalk, near a trail, under a stoop, in a key bowl -- something crows would consider. Collect it and bring it home.  Pick a number between 1 and 20. A handy 20-sided dice will do nicely (or use a random number generator online). Find your number and corresponding phrase from the list below, combine it with your object, and you are off to the races. If you are feeling inspired, choose another. And --If you are up to sharing, please send us what you’ve come up with -- we’d love to post it.
by Becca 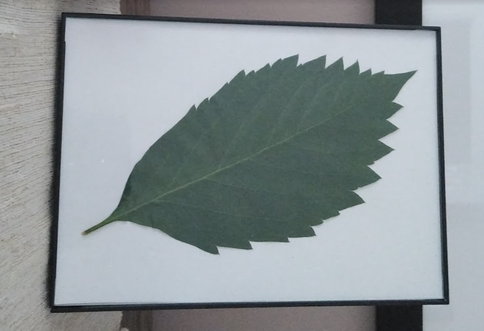 Hey teens! It’s Becca from the Main Library. In this DIY I’m going to show you how to add some nature to your room without the hassle of having to keep a plant alive. Pressed leaves and flowers can be used for so many things. You can add them to greeting cards, decorate a table or fireplace, or put them in frames like I’m going to show you. You’ll need the following materials:
Pressing leaves is one of the easiest projects! You just need to make sure the leaves and flowers you are pressing are freshly picked. The leaves need to have their natural moisture before you begin, or you’ll end up with crumbling leaves. (Be sure to only pick leaves and flowers from your own garden!) Let’s get started! Step 1: Pick your favorite leaves! Here are the leaves I picked. You can cut each leaf off the stem and arrange them however you’d like, but I liked these the way they grew naturally. 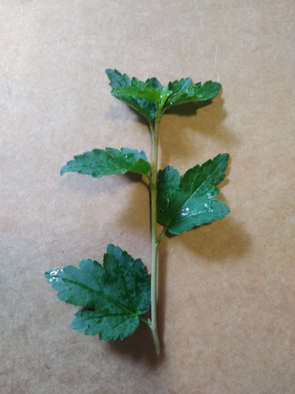 Step 2: Choose a large heavy book to use. Flip it open somewhere in the last half of the book. Lay a large piece of plastic wrap across the pages to keep them from getting wet. You can also use wax paper, aluminum foil, shopping bags, or anything that won’t let water seep through.  Step 3: Lay your paper towels on the plastic wrap with your leaves on top. You can also use tissue, toilet paper, handkerchiefs, or napkins. 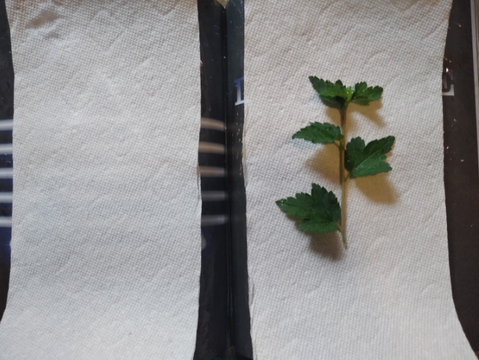 Step 4: Carefully close the book on top of your leaves. Make sure they aren’t folding in on themselves and are going to be pressed completely flat. 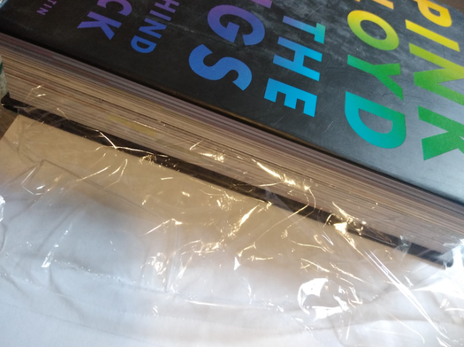 Step 5: Wait at least 4 days to a week before opening the book. If they still feel moist to the touch, you’ll want to wait a little bit longer. When they’re finally ready, carefully transfer them to a frame, lay them on a dresser, tape them to a window, or add them to any other project that inspires you! 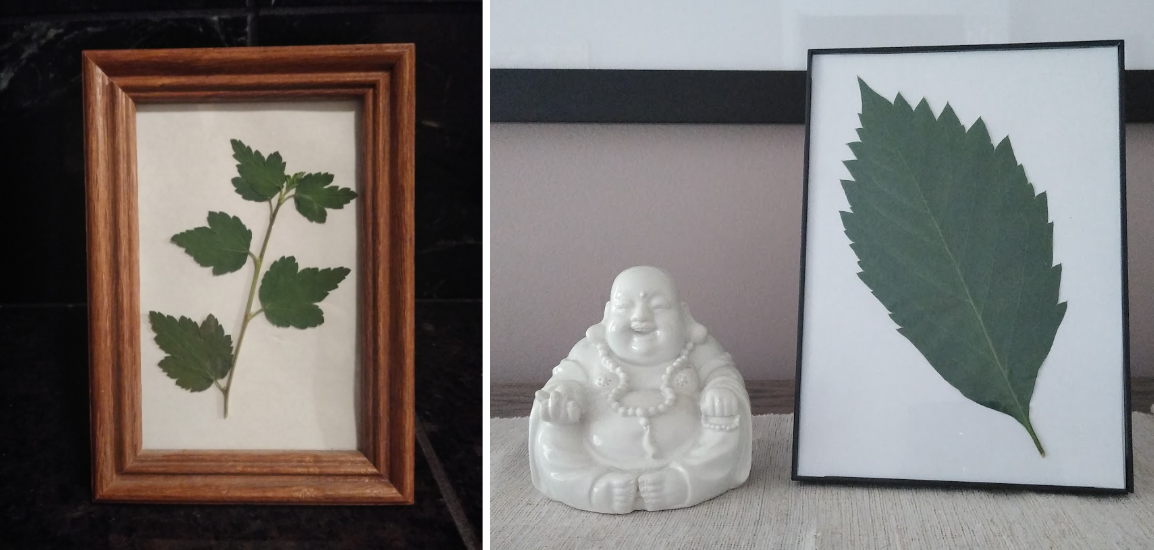 Did you try pressing your own leaves? Let us know in the comments how it went, or a share a picture of your creation on our art submission page. You can find more DIY activities in our Teen DIY collection on BiblioBoard. Let us know what kinds of craft tutorials you'd like to see next! by Becca 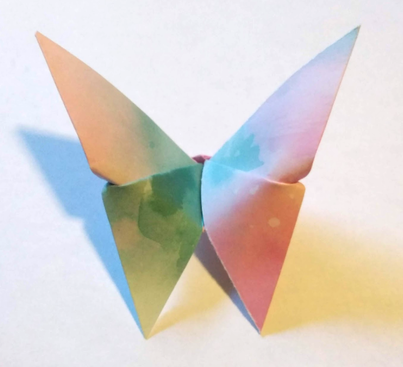 Hey there! I’m Becca, the Teen Librarian at the Main Library. Today’s DIY activity is making super easy butterfly origami. I love making origami, and I’m often caught doing so with paper I’m supposed to be taking notes on during meetings, or with napkins at a restaurant while I wait for my food. That’s what I love about origami, all you need is a piece of paper and your hands! My family comes from Japan and when I was a little kid, my grandma and I embarked on the journey of folding senbazuru (one thousand paper cranes). We only made it to 33, but I still have them and cherish them. Here’s a photo of them today! (Pro tip: Make time to create things with the people you love.) 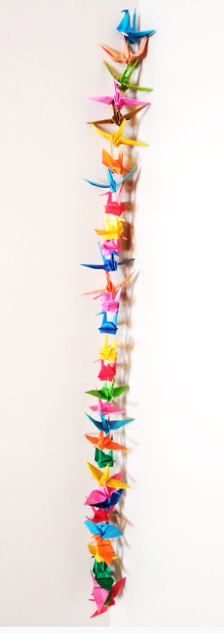 Senbazuru (千羽鶴) is simply one thousand paper cranes held together by string. These bundles are often made and given to those who are suffering from illness in hopes that they will have a speedy recovery. This is a photo I took at the Children’s Peace Monument in Hiroshima, Japan. The monument commemorates the thousands of children who were killed by the atomic bombs dropped on Hiroshima and Nagasaki during WWII. Cranes are a symbol of peace in Japanese culture. Aren’t they beautiful? 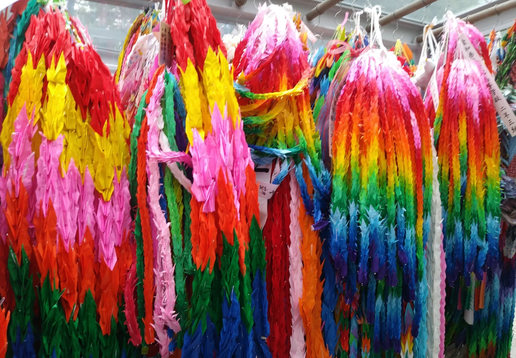 Well, anyway, we’re going to try something much easier. Let’s get started! I’m going to show you how to make this awesome little butterfly!  For most origami, you will need to start out with a perfectly square piece of paper. You can get packs of origami paper at most supermarkets or craft stores, but there is really no need to buy fancy paper. You can take any sheet of regular paper and make a perfect square from it. Draw and color on one side of the paper to help you distinguish between the front and back. I do this a lot and any pattern looks great once it’s folded! However, for this DIY video, I did want some fancy paper for a change. I stopped by a craft store and got this piece of scrapbook paper for just 54 cents. It’s a little thicker than origami paper, but for easy patterns it works great! Follow along and pause the video whenever you need to so you can catch up. がんばって! Good luck! So, how did it go? Post a picture of your butterfly origami in the comments! I would love to see your designs. What other origami DIY videos would you like to see in the future? Let me know!
For more Do It Yourself tutorials, visit our Teen DIY page on BiblioBoard! by Christine  Click on the above image to watch the cartoon on BiblioBoard! This cartoon was inspired by “The First Cat in Space Ate Pizza” by Mac Barnett and Shawn Harris. First we came up with a story about what happens at night in the library. Then we drew the background and some props that could be moved around on the background. Throw in some “fancy” camerawork and you too can make a “Live Cartoon!” Shots of our set and props: 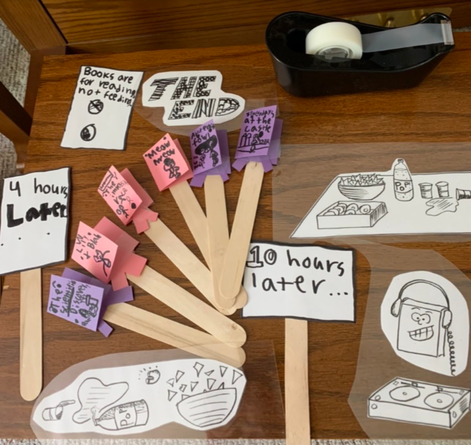 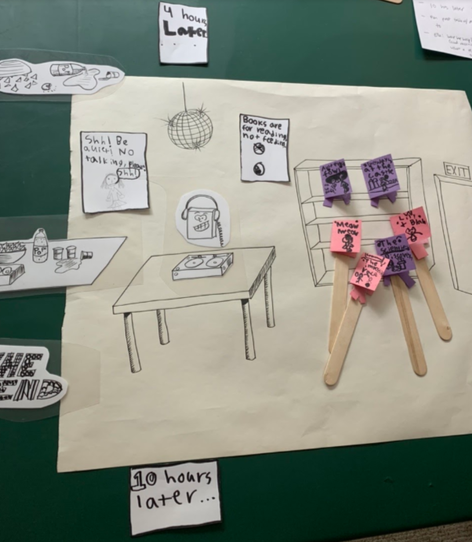 So, are you ready to make your own Live Cartoon? See our easy instructions here, and if you'd like to share your creation, consider submitting to our Local Teen Art collection.
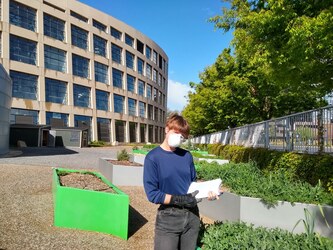
Thanks for watching! by Emmett and Rikki, The Plot Garden Coordinators 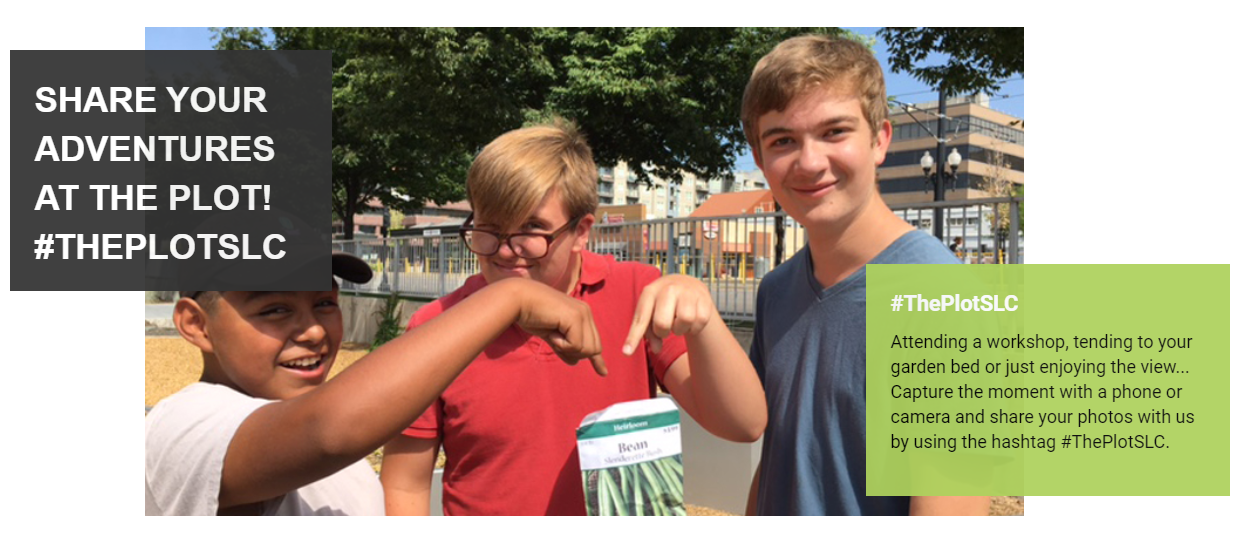 The PlotDid you know that the Main Library has a community garden? It does! It's called The Plot. Get it? Eh? Well, in addition to having a community garden, we also have two awesome Garden Coordinators: Emmett Wilson and Rikki Longino. Typically they help library users like you set up garden spaces in The Plot, host planting, harvesting, and even yoga workshops, and lovingly tend to the library gargen. This year things are a bit different. With the pandemic going on, we could not invite our community to create their own garden beds this year, but Emmett and Rikki still planted the garden full, and even added an edible garden pathway along the sidewalk on 400 south! Food grown in this year's garden will be donated to local shelters and community organizations. We hope you take a chance to visit the garden the next time you are downtown. Today's guest post by Emmett and Rikki is all about planting beans. Enjoy! - Steph C.
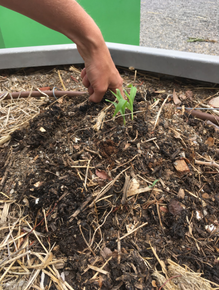
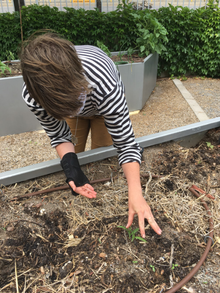
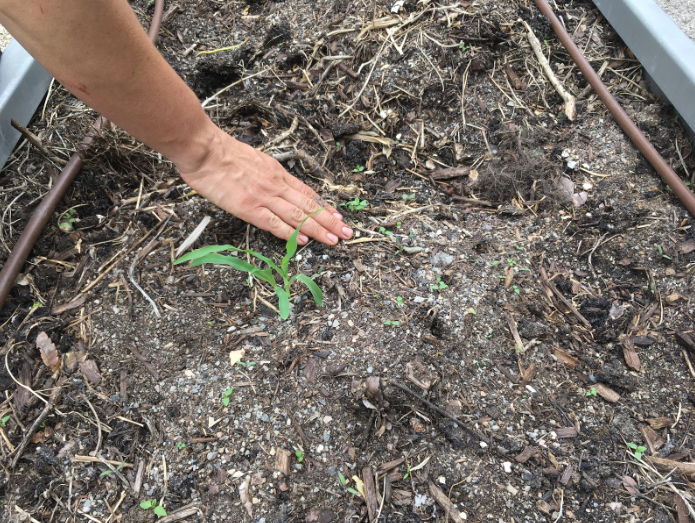
Fee, Fi, Fo, Fum, I hear the crunch of some beans, yum!What kind of beans are we talking about here? Coffee beans? Vanilla beans? We’re talking about green beans, lima beans, Purple Queen beans, and more! These are members of the Fabaceae or Leguminosea family, otherwise known as legumes, and commonly known as the Pea and Bean family. They fix nitrogen in the soil by developing rhizomes or ‘nitrogenous nodes’ on their roots that attract nitrogen from the soil (see photo). Above the ground, these plants grow pods containing the beans we know and love. Their nitrogen-fixing abilities make them great plants to grow in soil that might be depleted of this vital element from growing plants like tomatoes or cucumbers, both ‘heavy feeders’. Legumes like beans are the ‘universal donors’ of the plant community. 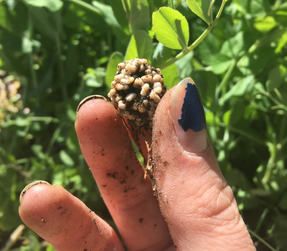 A node of nitrogen from the roots of an Austrian Field Pea that was planted as a winter cover crop at The Plot. There are two main categories of beans in the legume family: bush and pole, and many varieties within those categories. The categories describe themselves pretty well. Bush bean plants grow in a stout way, like a bush, and pole beans grow very tall, requiring a pole or some sort of trellising to support their growth. We planted both categories of beans at The Plot community garden! One of the Three SistersWho are the other two sisters besides pole beans? Corn and squash! This brilliant trio of plant sisters has been at the center of Native American agriculture and cuisine for centuries. How they collaborate: ‘Corn provides tall stalks for the beans to climb so that they are not out-competed by sprawling squash vines. Beans provide nitrogen to fertilize the soil while also stabilizing the tall corn during heavy winds. Beans are nitrogen-fixers meaning they host rhizobia on their roots that can take nitrogen, a much needed plant nutrient, from the air and convert it into forms that can be absorbed by plant roots. The large leaves of squash plants shade the ground which helps retain soil moisture and prevent weeds. These three crops are also at the center of culinary traditions and complement one another as well. A diet of corn, beans, and squash is complete and balanced. Corn provides carbohydrates and the dried beans are rich in protein and have amino acids absent from corn. Squash provides different vitamins and minerals than corn and beans. These three crops are also important because they can all be dried and used for food year round. These traits are less important today, but were important in the past which lead to their significance as the major cultivated foods. The tradition of calling these crops the "Three Sisters" originated with the Haudenosaunee, pronounced Ho-deh-no-shaw-nee. Also known as the Iroquois, Haudenosaunee occupy the regions around the Great Lake in the Northeastern United States and Canada. All three types of seeds are planted together in the same mound in the Haudenasaunee planting method. The elevated mound assists with drainage and avoids water logging of the plant roots which is important in this region that receives abundant rainfall in the summer.’ Source: Melissa Kruse-Peeples, Education Coordinator of Native Seeds SEARCH. We have planted three types of beans: 1.Scarlet Runner Beans are very similar to pole beans in the heart shape of their leaves and the fact that they grow tall enough to require a pole or some sort of trellising to support their growth. They are usually grown for their pretty red flowers, but their pods contain beans that can be eaten fresh or dried and boiled later. 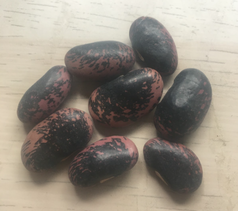 Dried Scarlet Runner beans that could be cooked or planted. 2. Red Noodle Beans were planted as a part of the three sisters demonstration around the corn sprouts. It is best to plant the corn first, then the beans and squash, allowing the corn a week or two to get established before physically supporting the beans that will grow faster than the corn.
Emmett made 2-3 inch deep holes to plant 2-3 beans around each corn sprout.
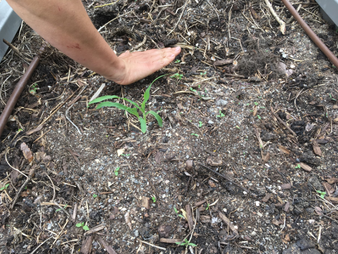
Rikki covered each hole with a little soil. The beans were planted about 4 inches away from the corn sprout to give all the roots room to grow. 3. Trio Bush Beans were soaked overnight before planting. This is not a necessary step for growing beans, but will speed up the process of imbibition: the uptake of water by seeds. This trio includes Blue Lake 274, Cherokee Wax, and Purple Queen Bean varieties. Soaking beans is easy. This is also a great thing to do if you are wanting to cook them. The water helps soften the beans and hydrates them for growth, or prepares them for being cooked! 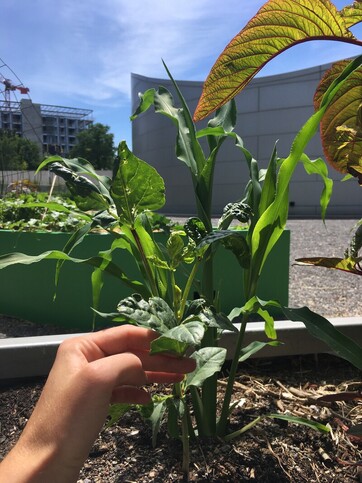 A recent photo of the bean plant growing strong. Do you need some free seeds to start your garden? We can mail some to you! Check out our seed catalog today on The Plot webpage. Happy planting! |